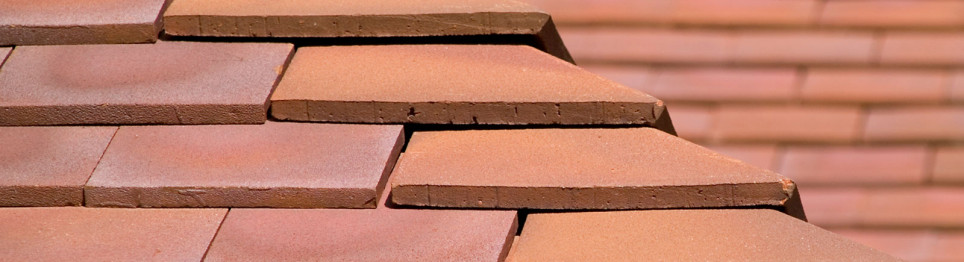
Hip with bonnet hip tiles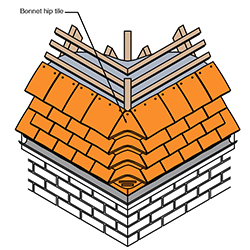
Lay courses of underlay over hip with overlaps of not less than 150mm. Bed bonnet hip tiles in mortar, coursing in with general tiling and fix to hip rafter with nails recommended by tile manufacturer. To avoid an excessive depth of mortar between bonnet hip tiles, a supplementary hip batten should be used.
Strike mortar back neatly about 13mm from edge of bonnet hip tile leaving the edges clean. Fill end of first hip tile with mortar and tile slips finished flush.
Cut adjacent tiles and tile-and-a-half tiles to fit neatly.
Hip with arris hip tiles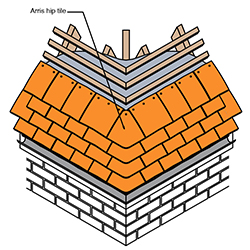
Lay courses of underlay over hip with overlaps of not less than 150mm.
Spot bed arris hip tiles in mortar, coursing in with general tiling and fix to hip rafter with nails recommended by tile manufacturer.
Cut adjacent tiles and tile-and-a-half tiles to fit neatly.
Note: Arris hip tiles are manufactured to suit specific rafter pitches, therefore the correct rof pitch must be stated when ordering.
Mitred hip with metal soakers
Lay courses of underlay over hip with overlaps of not less than 150mm. Cut tile-and-a-half tiles and fix to form a straight, weathertight, close mitred junction.
Interleave mitred tiles with metal soakers, extending a minimum 100mm to each side of hip. Fix soakers by turning down over heads of mitred tiles.
Note: Extreme care is needed to achieve a neat finish at the hip. Where possible it advisable to use either bonnet hip tiles or specify specially made arris hip tiles to suit the particular roof pitch instead.
Bedded hip with hip ridge tiles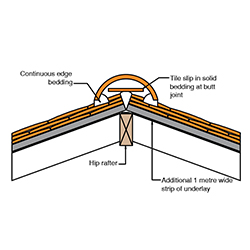
Lay courses of underlay over hip with overlaps of not less than 150mm. Cut and fix tiles closely at junction.
Fix hip iron to hip rafter or hip batten with galvanised steel screws.
Lay hip tiles by continuously bedding at edges and solidly bedding with tile slips inserted into mortar at joints between hip tiles.
Where masonry walls support or abut hip, all hip tiles within 900mm of such walls must be mechanically secured. Fix to supplementary hip batten with nails, clips or wire, etc, as recommended by manufacturer.
Shape first hip tile neatly to align with corner of eaves and fill end with mortar and slips of tile finished flush.
Note: The use of ridge hip tiles should be avoided where possible in favour of the use of bonnet or arris hip tiles.