Setting out
The setting out of battens needs to take into account the top and bottom of the wall and the openings through it, such as windows. The top of the wall and the bottom edge are called fixed points and the top and bottom of each opening are also defined as fixed points. The fixed points are used to calculate the batten gauge. For example, on a wall with one window, the bottom edge of the wall and the lower edge of the window will be used to calculate the batten gauge between these two points, and the bottom of the window and the top of the window are used to determine the batten gauge on this section of the wall, etc.
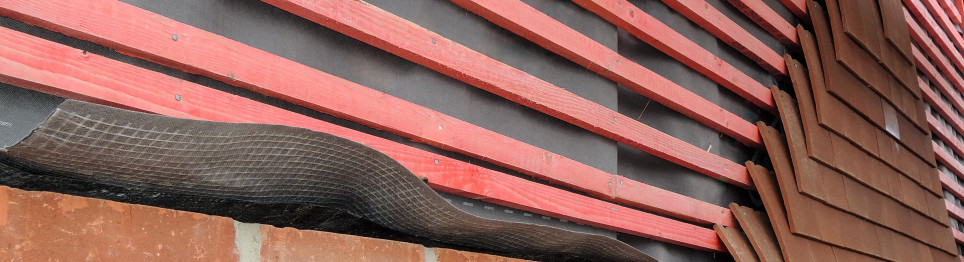
Starting at the bottom edge of the wall a full length tile is positioned to ensure that it just covers the wall structure below it but does not interfere the opening of any doors or windows. The position of the underside of the nibs are marked on the wall and the process repeated at various positions along the wall. Ideally, all the marks should be in the same horizontal plane. If they are not, one mark should be adopted as the common datum, or, a step in the tiling should be established to allow for at a feature such as an internal corner. Where a change of bottom row of tiles is planned the difference in level should be a module of the tile gauge, which can be any dimension between 114mm and 88mm. When the line of the top of the first batten is set, it should be nailed in position.
The top of the wall has the top course (eaves / top tiles) and is set out to allow the head of the top tile, including the nibs, to fit under the eaves, or, other feature. Once this batten is in place, the last full tile batten can be located to allow just enough space between the bottom of the top tile batten and the top of the last full tile batten, to permit the last full tile to slide between them. Provided the tile batten is no wider than 38mm the top tile should provide adequate cover for the last full tile course. The first fixed point should be identified, which may be a windowsill. The top tile course (eaves / top tiles) is set out to allow the head of the top tile, including the nibs, to fit under the windowsill.
With the batten in place, the last full tile batten can be located to allow just enough space between the bottom of the top tile batten and the top of the last full tile batten, to allow the last full tile to slide between them. Provided the tile batten is no wider than 38mm the top tile should provide adequate cover for the last full tile course. If the distance between the eaves course and the first fixed point is relatively short it may be difficult to set a gauge that reaches the windowsill and a decision to have a longer flashing may need to be made.
Between the top of the first and the last full tile courses of any fixed points, the intermediate battens will need to be set out to ensure that the gauge is as close to 115mm, but not less than 88mm. This is achieved by measuring the overall gauge distance and dividing it by 115mm.
The answer to the sum will be a whole number and a decimal point. Whatever the whole number is, increase it by one and divide that number into the gauge distance. The answer to this sum will provide the gauge that the intermediate battens should be set out at.
The next fixed point in the wall needs to be identified and set out depending upon whether it is a bottom edge or top edge, and the battens between them gauged out equally until the last full tile batten is reached.
All tile battens should be horizontal (level) and straight, with no sags.
Having set out and nailed all the battens the setting out of tiles on each batten should be considered. Each plain tile is 165mm wide and should have up to 3mm gap between them. The first course of tiles should be set out to equalise all the gaps between the tiles, start and finish at corner or abutments and hopefully line up with the sides of window openings. Having settled on an arrangement, the battens should be marked every third or fifth joint. To ensure that the joints are vertical drop plumb lines and mark the battens.
The eaves course of tiles are laid broken bond to the first course of tiles – this may require the use of an eaves tile and half. These can be made by cutting a full tile-and-a-half down to the same length as the eaves tile. The same may apply at the top tile course but is more critical as it is more visible.
At window reveals it may be necessary to finish with a cut tile-and-a-half on each course to maintain the vertical perpendicular joints. The tiles may need to be sorted to mix oversize and undersize tiles together to ensure that an averaging out allows the perpendicular joint lines to be kept vertical. If this becomes a problem it may be necessary to trim every fifth tile down to suit.
Tiles should always be sorted and mixed from at least three pallets to ensure that the variations in shade and colour from different parts of the kiln do not give a patchy effect. Also, tiles that are twisted may kick out in one position, but sit happily in another when tried.
It can be seen that, like brick laying, vertical tiling needs more planning during the setting out phase than roof tiling and being more visible requires greater care in maintaining the vertical joint lines.
Because less rain and frost are likely to fall on vertical tiling the self cleaning action of the elements are a lot slower, therefore, marks on vertical tiling may need to be cleaned off rather than waiting for the natural weathering of the tiles.