The following illustrations and text explain the common main tile design details that can occur on refurbishment and new work with internal and external corners.
![]()
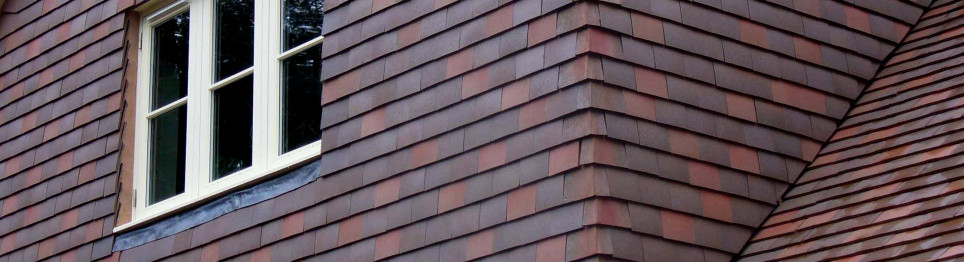
External angle with angle tiles
The first counterbatten should be fixed approximately 20mm in front of the end of the batten to prevent the end nail from splitting the tile batten. The cut ends of the tile battens should be alternated to coincide with the short leg of the external angle tile.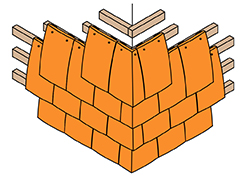
Handed external angle tiles are laid alternately up an external corner
Each external angle tile should be twice nailed.
Avoid cutting the external angle tiles to make them fit.
![]()
External angle with metal soakers
The first counterbatten should be fixed approximately 20mm in front of the end of the batten to prevent the end nail from splitting the tile batten.
A Code 3 lead soaker is required on each course of tiles. The soaker is cut and folded from sheet minimum 200mm wide and 200mm long. The bottom edge of the soaker is flush with the bottom edge of the tile course above and the top is folded over the head of the tile.
Use tiles and tile and half tiles cut to a mitre in alternate courses to maintain the bond. Twice nail all tiles.
![]()
Internal angle with angle tiles
The first counterbatten should be fixed approximately 20mm in front of the end of the batten to prevent the end nail from splitting the tile batten.
The cut ends of the tile battens should be alternated to coincide with the short leg of the internal angle tile.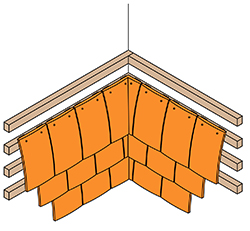
Handed internal angle tiles are laid alternately up an internal corner.
Each internal angle tile should be twice nailed.
Avoid cutting the internal angle tiles to make them fit.
![]()
Internal angle with metal soakers
The first counterbatten should be fixed approximately 20mm in front of the end of the batten to prevent the end nail from splitting the tile batten.A Code 3 lead soaker is required on each course of tiles.
The soaker is cut and folded from sheet minimum 200mm wide and 200mm long.
The bottom edge of the soaker is flush with the bottom edge of the tile course above and the top is folded over the head of the tile.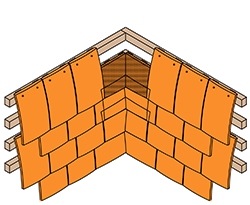
Use tiles and tile and half tiles cut to a mitre in alternate courses to maintain the bond. Twice nail all tiles.
![]()
Enlarged view of cutting to internal corner
Finish battens approximately 10mm short of abutment wall to allow underlay to turn around the internal corner by 50mm.
Fix the first counterbatten approximately 20mm in from the end of the batten to prevent the end nail fixing from splitting the tile batten.
Turn a cut, folded and welted strip of Code 4 lead 1.5m long and approximately 250mm wide into the joints in the brick or block-work.
Dress the lead over each batten to hold it in place and not interfere with the tile nibs.
![]()
Flashing to side abutment with soakers
Finish battens approximately 10mm short of abutment wall to allow underlay to turn around the internal corner by 50mm.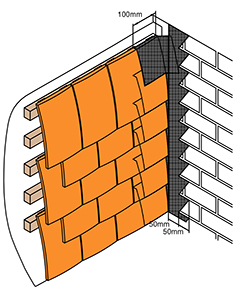
Fix the first counterbatten approximately 20mm in from the end of the batten to prevent the end nail fixing from splitting the tile batten.
Fix a soaker, cut and folded from Code 3 lead sheet, minimum 200mm wide and 200mm long, to each course of tiles.
The bottom of the soaker should be flush with the bottom edge of the tile in the course above and the top should be folded over the head of the tile to prevent it dropping out.
Turn a cut and folded strip of Code 4 lead 1.5m long and approximately 100mm wide into the joints in the brick or block-work, covering the exposed ends of the soakers by approximately 50mm.